In the city at night, front-lit channel letters are one of the most common forms of shop signs. From structural design, material selection, manufacturing to installation, every step directly affects the sign’s brightness, lifespan, and safety.
This article will systematically explain:
- The structural composition of front-lit channel letters
- How to select appropriate materials based on the application scenario
- The complete installation process and precautions from factory to site
Suitable for sign manufacturers, advertising companies, designers, and owners who need to install 3D lettering.
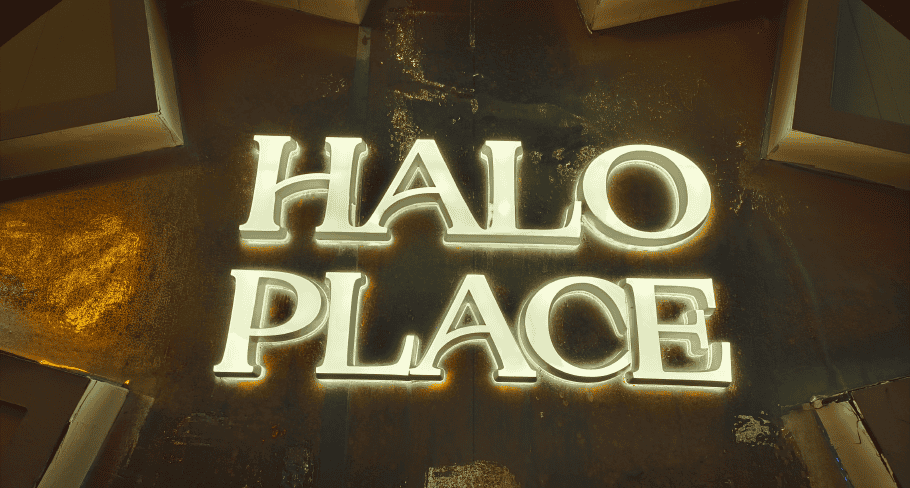
What are Front-Lit Channel Letters?
Front-lit channel letters, also called face-lit channel letters, are the most common type of illuminated sign letters and typically have the following characteristics:
- Face of the letter lights up
- Light shines outward through the acrylic front
- Sides and back are typically aluminum (not lit)
Front-lit channel letters are well-suited for the following scenarios:
- High-traffic areas where visibility is crucial, such as large shopping malls
- Retail storefronts, restaurants, and service-based businesses
- Companies that want simple, bold nighttime visibility
The Structure of Front-Lit Channel Letters
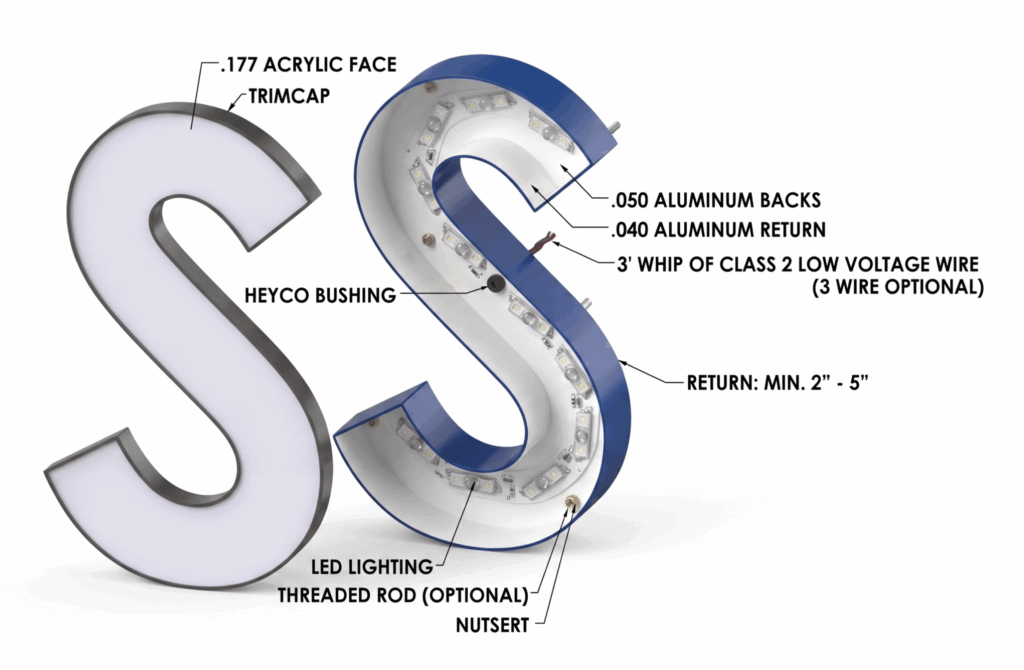
Front-lit channel letters primarily consist of an acrylic face, trim cap, aluminum returns, an aluminum back, and internal LED modules. The front panel combines the acrylic face with a trim cap, while the letter housing is formed by welding the return and back sections. The interior is coated with white reflective paint to maximize brightness, where the LED modules are securely installed. Additionally, the aluminum back features pre-drilled holes equipped with HEYCO bushings for wire protection, along with screws for easy installation. Their structural breakdown is illustrated in the diagram below:
How to Choose the Right Channel Letter Material?
Front-lit channel letters typically use translucent acrylic for the front panel. Sometimes, printed translucent vinyl, cut vinyl, or day/night vinyl are applied to the acrylic panel, or the front is simply open-faced, exposing the neon or faux neon inside. The casing is usually made of lightweight and rust-resistant aluminum, but stainless steel, corten steel, or brass are also used, or even translucent acrylic can be used directly.
So, how should these materials be selected?
It consists of three steps.
Step 1: Select Face Materials
| Material | Pros | Cons | Best Use Cases |
|---|---|---|---|
| Translucent Acrylic | Industry Standard. Excellent light transmission; superior weather resistance; high surface gloss and UV stability. | Brittle; can crack under heavy impact; large faces may bow or warp due to thermal expansion. | Standard commercial signage, indoor and outdoor retail logos. |
| Polycarbonate (PC) | Virtually Unbreakable. Extremely high impact resistance; higher fire rating; better thermal stability for oversized letters. | Prone to yellowing over time (if not UV-treated); surface scratches easily; slightly lower light clarity than acrylic. | High-wind/Hurricane zones, oversized outdoor signs, or ground-level signs prone to vandalism. |
| Open Face | High visual impact; distinct “retro” or industrial aesthetic; maximum brightness with no light loss from a lens. | LEDs or Neon are exposed to elements; collects dust and debris; requires more frequent cleaning and maintenance. | Bars, vintage-themed stores, and high-end artistic architectural lighting. |
Step 2: Select Face Overlays
| Type | Pros | Cons | Best Use Cases |
|---|---|---|---|
| Printed Translucent Vinyl | Allows for any gradient, complex textures, or specific photographic imagery. | Colors may fade faster under direct UV exposure compared to solid-cut vinyl. | Logos with complex brand patterns or full-color photographic elements. |
| Cut Translucent Vinyl | Vibrant, saturated colors; excellent long-term durability and UV resistance. | Limited to available color catalogs; cannot produce gradients or photo-realism. | Brands with consistent, solid-color identity requirements. |
| Day/Night Vinyl | Black during the day, glows white at night. Maintains brand aesthetics without sacrificing visibility. | Higher material cost; requires higher LED density/output to punch through the perforated film. | Brands with black logos that must remain visible and luminous after dark. |
Of course, if we choose not to apply face overlays, then we can skip this step.
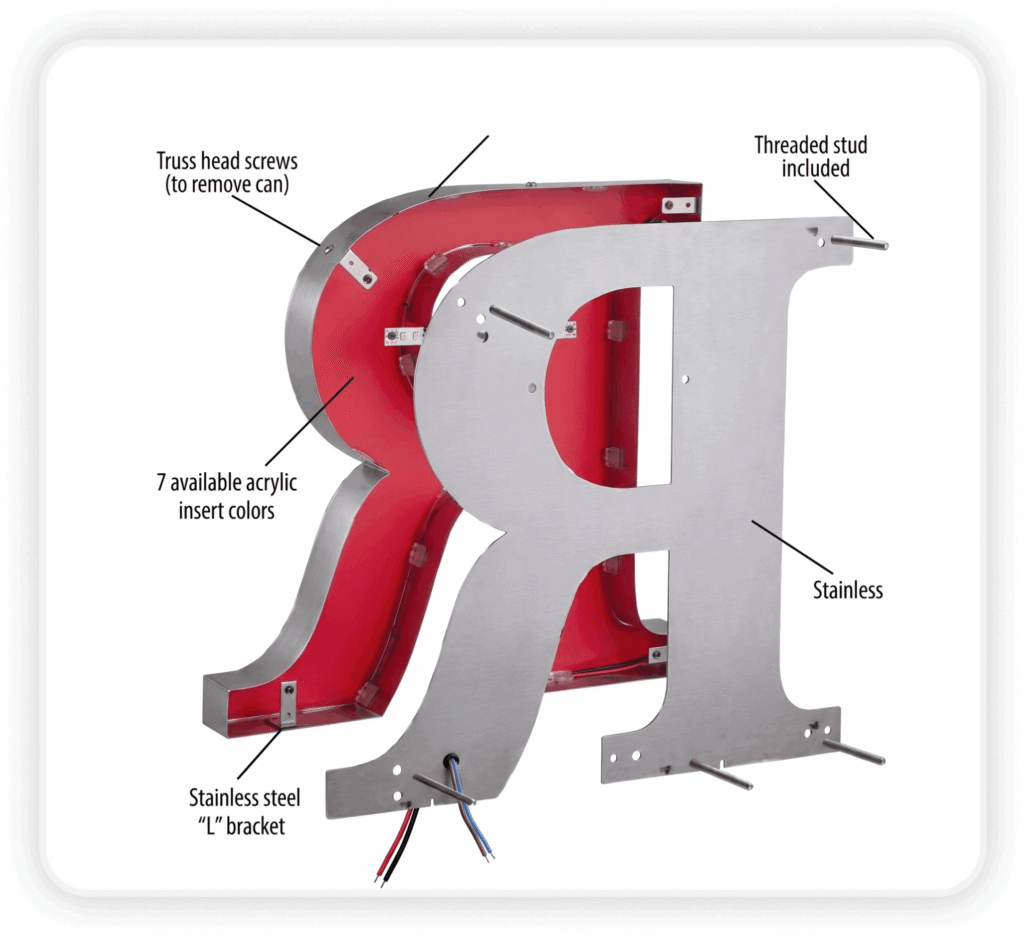
Step 3: Select Returns/Backs Materials
| Material | Pros | Cons | Best Use Cases |
|---|---|---|---|
| Aluminum | Lightweight and Rust-proof. Easy to bend/fabricate; excellent heat dissipation for LEDs. | Lower structural strength than steel; requires specialized welding equipment. | The “Gold Standard” for 95% of all commercial channel letters. |
| Stainless Steel | High structural integrity; premium finish options (Mirror, Brushed, Titanium plated); highly corrosion-resistant. | Significantly heavier; more expensive material and labor; harder to fabricate. | Luxury retail, high-rise buildings, and harsh coastal/marine environments. |
| Corten Steel | Unique “weathered” industrial look; develops a natural protective rust patina over time. | Runoff can stain surrounding walls; rougher texture not suitable for all brands. | Art districts, landscape signage, and rustic/heritage-themed projects. |
| Brass | Ultimate luxury aesthetic; high decorative value; very prestigious appearance. | Extremely expensive; heavy; requires clear coating to prevent unwanted tarnishing. | Banks, law firms, and high-end boutique storefronts. |
| Translucent Acrylic | Enables 360° illumination (face and sides light up); creates a “floating” glowing effect. | Lowest structural strength; all internal wiring/glue must be impeccably clean as it is visible. | Small-scale boutique lettering or high-end interior wayfinding. |
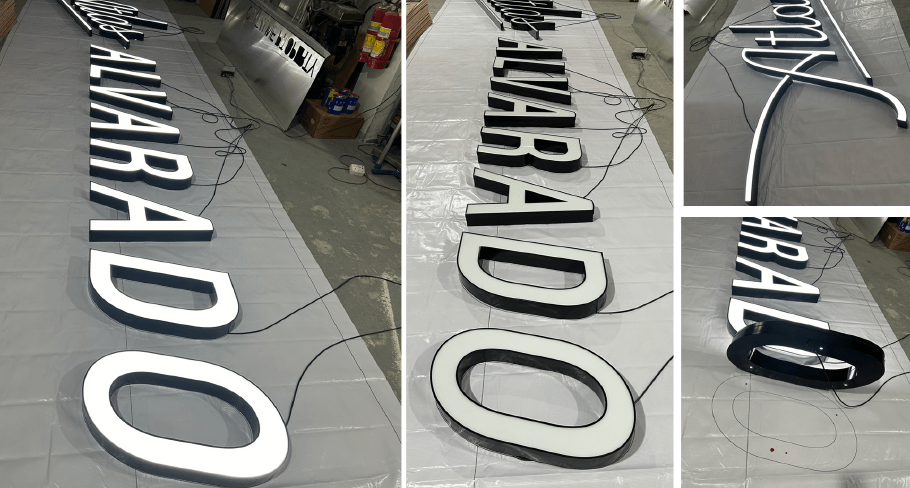
Front-Lit Channel Letters Manufacturing Process
After selecting the materials, the next step is manufacturing.
The creation of front-lit channel letters generally involves the following process:
- Material Cutting: CNC routing for acrylic faces and Laser Cutting for metal returns/backs.
- Letter Bending: Automated precision bending of returns to match the letter stroke.
- Welding & Assembly: Joining returns and backs with welding, riveting, or other structural fastening methods.
- Painting & Finishing: Interior White Reflective Coating and exterior custom brand color finishing.
- LED & Component Integration: Strategic LED layout to eliminate Hot Spots, plus installation of Bushings, Nutserts, and a 24–48 Hour Burn-in Test.
- Face Assembly: Installation of the Acrylic Face and Trimcap with industrial-grade sealing and fastening methods.
- Mounting Prep: Preparation of Raceways, mounting hardware(e.g., Threaded Rods), and a 1:1 Paper Pattern for on-site installation.
- QC & Shipping: Final inspection of Luminance Uniformity and waterproof sealing, followed by Heavy-duty Crating for safe transit.
How are Front-lit Channel Letters Installed?
The standard installation process for a channel letters are as follows:
- Site Preparation: check conditions, clean the area, and confirm the layout.
- Measurement and Marking: mark mounting points using templates for alignment.
- Structure Attachment: install raceway, wireway, or backer if required.
- Wiring: route and secure power cables.
- Letter Installation: mount letters using screws, studs, or adhesives, ensuring stability and alignment.
- Electrical Connection: connect LEDs and verify electrical components.
- Final Testing: check lighting, adjust brightness, timer, and inspect for any issues.
- Finishing and Cleaning: make adjustments, clean the sign, and remove debris.
- Final Handover: inspect with the client and ensure compliance with regulations.
Front-lit channel letters can be installed in the following 5 ways:
- Studs
- Studs with Spacers
- Double-sided Tape
- Raceway/Wireway
- Mounted with Backer
Stud Mounted
Studs are attached to the back of the letters and secured to the wall, electrical wiring is typically routed through the back of the wall, Provides a clean and minimalist appearance.
As shown in the image below:
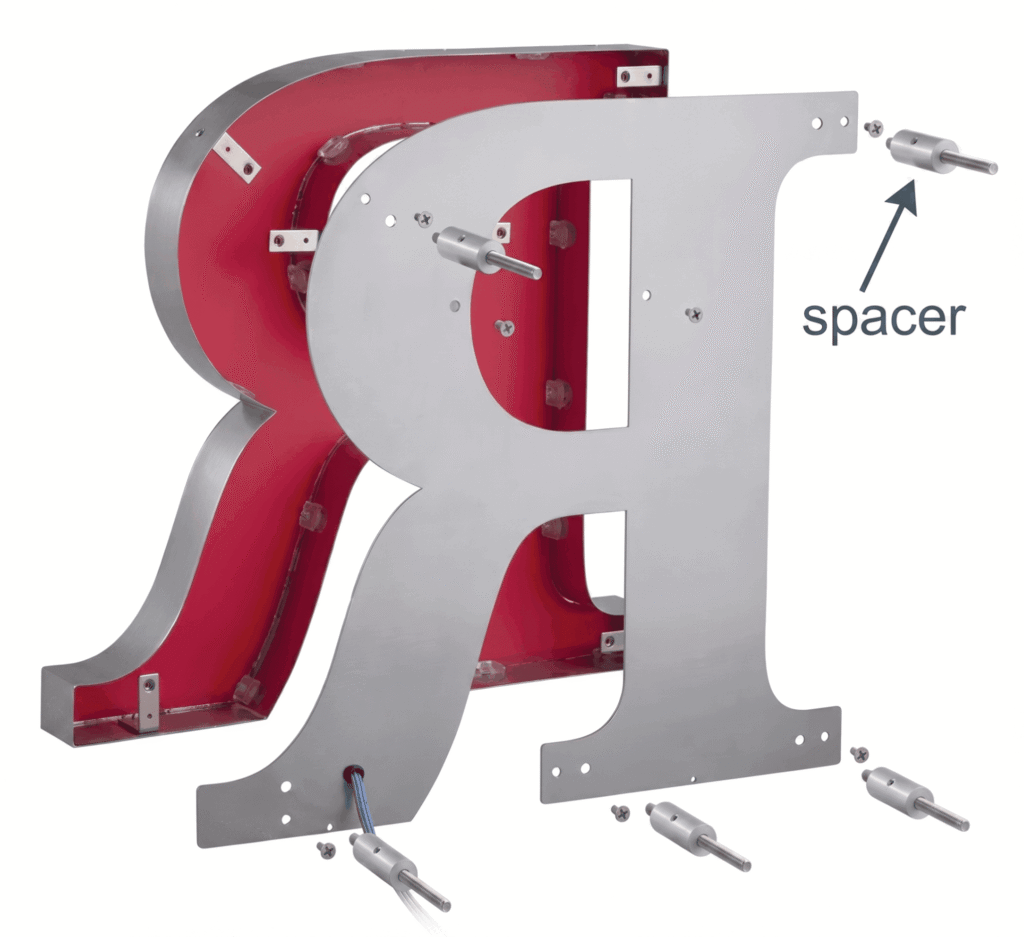
Studs with Spacers
Studs with spacers are installed almost identically to studs, the only difference being the addition of a spacer. This spacer creates a gap between the letters and the surface, often used for halo-lit letters or solid materials. Electrical wiring is typically routed through the back of the wall, as shown in the diagram below:
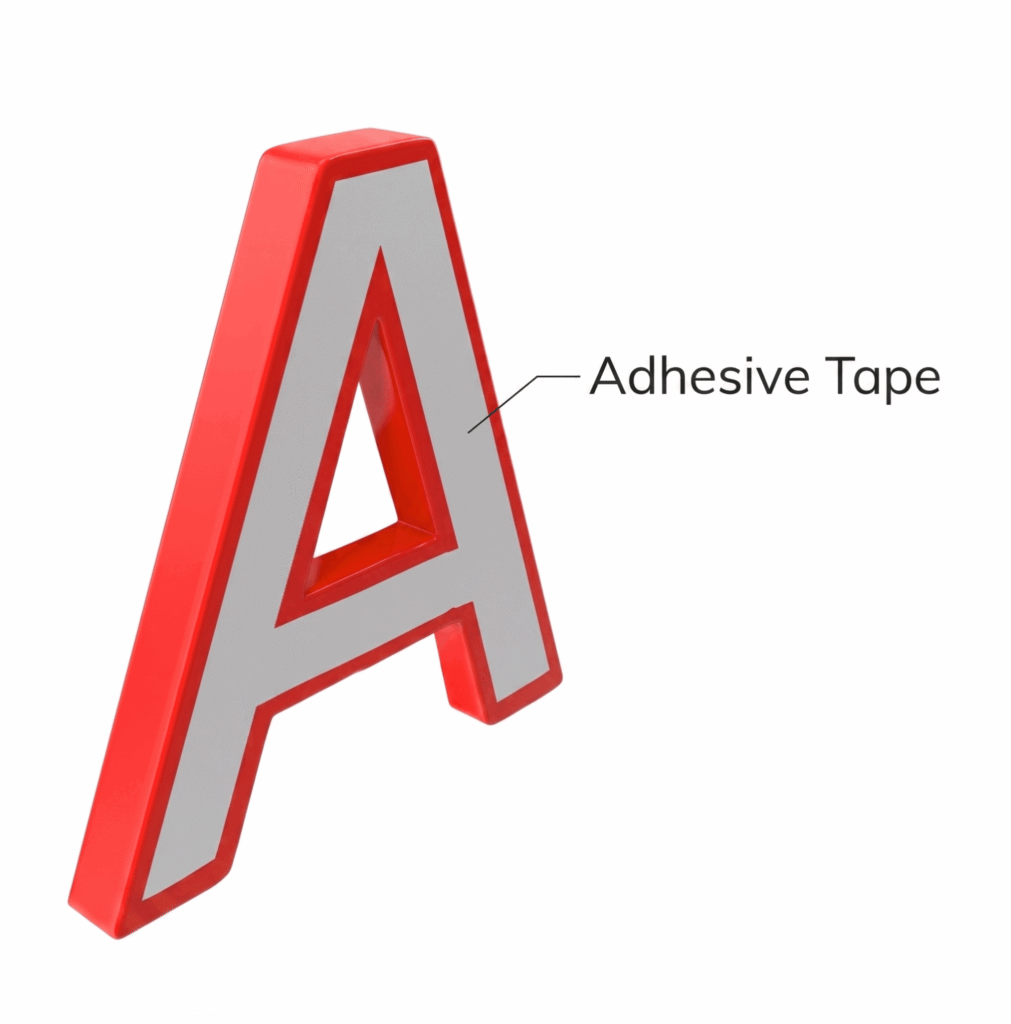
Double-sided Tape
Double-sided tape is easier to understand, it is tape mounted, letters are attached to the surface using strong, double-sided adhesive tape, ideal for lightweight signs or temporary installations, requires a clean, smooth surface for proper adhesion, electrical wiring is typically routed through the back of the wall, as shown in the following figure:
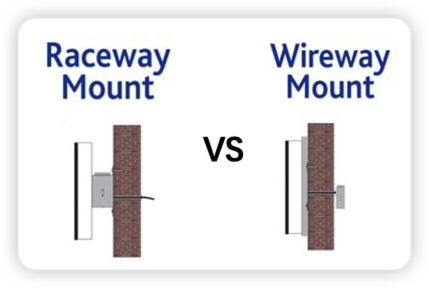
Raceway/Wireway
Raceway and wireway are used when reducing the number of wall penetrations and holes is a priority, or when access behind the wall is limited.
However, there are differences between them, as shown in the table below:
| Feature | Raceway | Wireway |
|---|---|---|
| Profile & Size | Larger, deeper, and more substantial. | Smaller, slimmer, and less bulky than a raceway. |
| Enclosure Capacity | Houses wires, transformers, and mounting hardware for a cleaner look. | Houses wires only to minimize structural depth. |
| Aesthetic Goal | Provides a self-contained, unified look. | Suitable for surfaces where minimal hardware exposure is preferred. |
| Best Used For | Often preferred for large signs or complex installations. | Used when a slimmer, more discreet mounting is desired. |
Raceway is shown in the image below:
Wireway is shown in the image below:
See the image below for a side view of the Raceway and Wireway:
Mounted with Backer
The mounting method with a backer involves using a panel designed for aesthetic purposes or for installation/electrical applications. The backer can be made of the following materials:
- ACM (Aluminum Composite Material)
- Acrylic
- PVC
- Aluminum
- Etc
The installation effect of mounting with backer is shown in the following image:

Note: If your project is located in California or Los Angeles County, general installation methods must strictly follow local zoning and building codes. Check out our California & Los Angeles County LED Channel Letter Installation Compliance Guide (2026 Edition) to ensure your signage passes the local city inspection smoothly.
How to Choose?
How do I choose between these five installation methods?
You can install front-lit channel letters in five main ways. Each method has trade-offs in appearance, cost, installation difficulty, and wall damage.
Below is a summary comparison table I’ve compiled to help you choose the correct option:
| Method | Appearance | Installation Difficulty | Cost | Wall Damage | Best Use Case |
|---|---|---|---|---|---|
| Studs | Clean, minimalist, letters appear to “float” slightly | Medium | Medium | Moderate (holes for studs) | Permanent storefront signs where wiring can pass through the wall |
| Studs with Spacers | Letters stand off from the wall, creating a 3D shadow effect | Medium | Medium–High | Moderate (holes for studs) | Halo-lit letters or solid-material letters where back-lighting is desired |
| Double-sided Tape | Very clean look, no visible hardware | Low | Low | Minimal (no drilling) | Lightweight signs, temporary installations, smooth non-porous surfaces |
| Raceway / Wireway | Visible box on the wall, unified and professional look | Medium–High | Medium–High | Moderate (anchoring + wiring) | Large signs, complex installations, or when wall access behind is limited |
| Mounted with Backer | Uniform panel background, modern and cohesive look | Medium | Medium–High | Moderate (mounting backer + letters) | Multi-letter logos, ACM/acrylic/PVC backs, aesthetic or branding requirements |
Cost and Price Factors
Front-lit channel letters typically do not have a standard price; their cost is primarily influenced by the following factors:
- Size and Number of Characters: Larger and more numerous characters require more materials and LEDs, resulting in a higher price.
- Material Selection: High-weather-resistant acrylic, stainless steel edging, and outdoor-grade paint are more expensive than ordinary materials.
- LED Quantity and Quality: Higher brightness and better protection rating (IP rating) LED modules are more expensive.
- Installation Difficulty: Installation costs will significantly increase for projects involving high-altitude work, complex facades, or requiring scaffolding or special supports.
- Customization Level: Complex fonts, irregular structures, special colors, or processes also increase costs.
The exact price needs to be quoted based on the customer’s design drawings and site conditions.
If you require front-lit channel letters, you can Contact Us to get a customized quote.
Maintenance and Troubleshooting
If highly weather-resistant materials are selected, the maintenance of channel letters is not complicated, and the maintenance frequency will be significantly reduced.
Routine maintenance mainly includes: regular cleaning, checking lights and electrical connections, and checking sealing and securing.
It is generally recommended to inspect and clean at least once a year, and in highly polluted outdoor environments or coastal environments with high salt spray, it is recommended to inspect every 6 months.
The following are common problems, causes, and solutions during channel letters maintenance:
- Inconsistent or Uneven Lighting
- Cause: Individual LED damage, unstable driver, poor wiring contact.
- Recommendation: Replace the damaged LED module, check the driver power supply and wiring, and redesign the LED layout if necessary.
- Power Supply Issues
- Causes: Power supply failure, blown fuse, open circuit or short circuit.
- Recommendations: Check the power supply output voltage and current, replace the damaged power supply, repair or rewire.
- Water Infiltration
- Causes: Aging sealant, inadequate waterproofing at joints, and poor sealing between acrylic and the edging.
- Recommendations: Reapply sealant, inspect and replace aged sealant, and ensure proper waterproofing during the initial installation.
- Mounting Issues
- Causes: Loose fasteners, improper base design, and long-term wind load.
- Recommendations: Regularly inspect bolts, brackets, and threaded rods; reinforce or replace mounting components as necessary.
- Fading of Raised Faces
- Causes: Prolonged exposure to sunlight and rain, use of non-outdoor grade materials or paint.
- Recommendations: Choose UV-resistant acrylic and outdoor weather-resistant paint; replace faded caps if necessary.
- Finishing Failures
- Causes: Insufficient material quality, harsh environment, improper cleaning methods.
- Recommendations: Use materials and paints with better weather resistance, avoid strong corrosive cleaning agents, and perform regular cleaning and inspection.
FAQ
What Wattage Power Supply Should be Selected for LED Channel Letters?
The appropriate power supply consumption for LED channel letters depends primarily on the number of LED modules contained within them. Taking a channel letter containing 50 LED modules as an example, the calculation method is as follows:
- Number of Modules: 50
- Power Consumption per Module: 0.72W
- Total Power = 50 x 0.72 = 36W
- Safety Margin: 25%
- Total Power with Margin = 36 x 1.25 = 45W
- Recommended Driver: Choose a power supply with a capacity higher than 45W(e.g., 60W).
Do Front-Lit Channel Letters Need UL-Certified Components?
Yes, We strongly recommend that you use UL-certified components.
In the U.S., UL certification is often required for commercial outdoor channel letters by building codes and inspectors (UL 48/UL 879). Even when not mandatory, using UL-listed LED modules, drivers, and wiring is strongly recommended for safety, insurance, and permit approval.
What Is the Best Material for Outdoor Front-Lit Channel Letters?
For most outdoor applications, translucent acrylic (face) + aluminum (returns/back) offers the best balance of performance and cost. Acrylic provides excellent light transmission, UV stability, and weather resistance. In high-impact or vandalism-prone areas, use polycarbonate instead.
For returns/back, aluminum is the industry standard: lightweight, rust-proof, and easy to fabricate. In coastal or corrosive environments, choose stainless steel or marine-grade aluminum.
Use outdoor-grade, UV-resistant paint externally and white reflective coating internally to maximize brightness. For harsh environments, prioritize UV-stabilized acrylic, stainless steel/coated aluminum, and high IP-rated LED modules.
Take Away
- Front-lit channel letters are the most common type of illuminated sign letters, offering strong nighttime visibility and brand recognition.
- Their structure consists of an acrylic face, trim cap, aluminum (or metal) returns, back panel, and internal LED modules with white reflective coating.
- Material selection directly affects brightness, durability, maintenance cost, and lifespan.
- Manufacturing includes cutting, bending, welding/assembly, painting/finishing, LED integration, sealing, and QC with a 24–48 hour burn-in test.
- Installation method depends on wall type, wiring access, appearance requirements, and budget.
- The five main installation methods are: studs, studs with spacers, double-sided tape, raceway/wireway, and mounted with backer.
- Routine inspection and cleaning help prevent uneven lighting, water infiltration, power issues, and mounting failures.
- Choosing UV-resistant materials and proper waterproofing significantly reduces long-term maintenance.
Want to explore more types? Check out our comprehensive guide on What Are the Different Types of Channel Letters? to find the perfect fit for your brand identity.
Why Choose FT Signage
As a veteran expert in LED signage manufacturing and export compliance, FT Signage offers:
- UL-certified LED components for safety and code compliance
- 24-hour aging testing before delivery to ensure reliability
- Free samples before batch orders to confirm quality and design
- End-to-end support from design to export and installation
Ready to light your brand with color and durability?
Contact Us to discuss your customization needs and explore further details.